 Valentine’s Day. An excuse for heart-shaped baking. I’m in!
Lemon is my favorite sweet/dessert flavour second only to chocolate, but it’s hard to buy decent lemon baked goods. I hate fake lemon even more than I love real lemon, and unfortunately most of the time, store-bought lemon-flavoured things are pretty dreadful. So in the case of lemon, it’s best to take matters into your own hands.

I recently found out that Nate’s favorite Danishes are lemon, which meant that I obviously had to make some myself (see above). The last time I made Danishes it was a long and drawn out process, so I asked the Google machine for a quick Danish pastry recipe and it came up with this one by Scandinavian pastry chef Beatrice Ojakangas. This recipe appears in the very popular cookbook “Baking with Julia” by Dorie Greenspan, and employs what is apparently (according to something I read on the internet, so you know it’s true!) the most widespread method used in Danish-making countries (ie, Denmark, I guess).

In this “quick method”, rather than enclosing a block of butter in the dough, you cut the butter into the flour, similar to making pie dough or scones (essentially, it’s a rough puff version of Danish pastry). You go through the same rolling and folding and rolling and folding (and rolling and folding), but it is a much more forgiving process that doesn’t require endless chilling and neurotic trimming of edges. You don’t get quite the same flaky layers as traditional laminated dough, but it’s considerably faster and definitely better than most Danishes you can buy in a store (especially the lemon ones!). The dough requires an overnight rest in the fridge, so in the morning you can take it out, give it a few folds, then shape and bake and have fresh Danishes for your Valentine – or you could have, if I’d gotten this post up before today! ![]() Your co-workers will also be quite pleased if you share with them (I speak from experience).
Your co-workers will also be quite pleased if you share with them (I speak from experience).

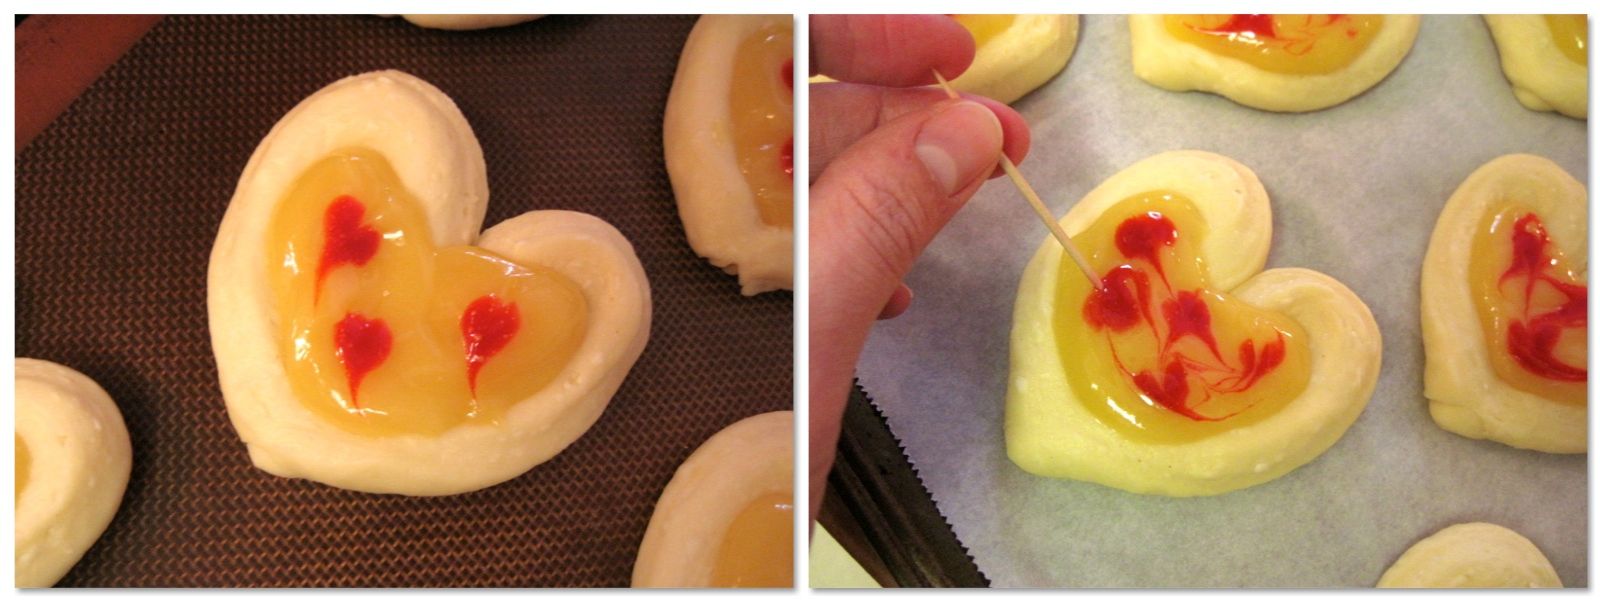
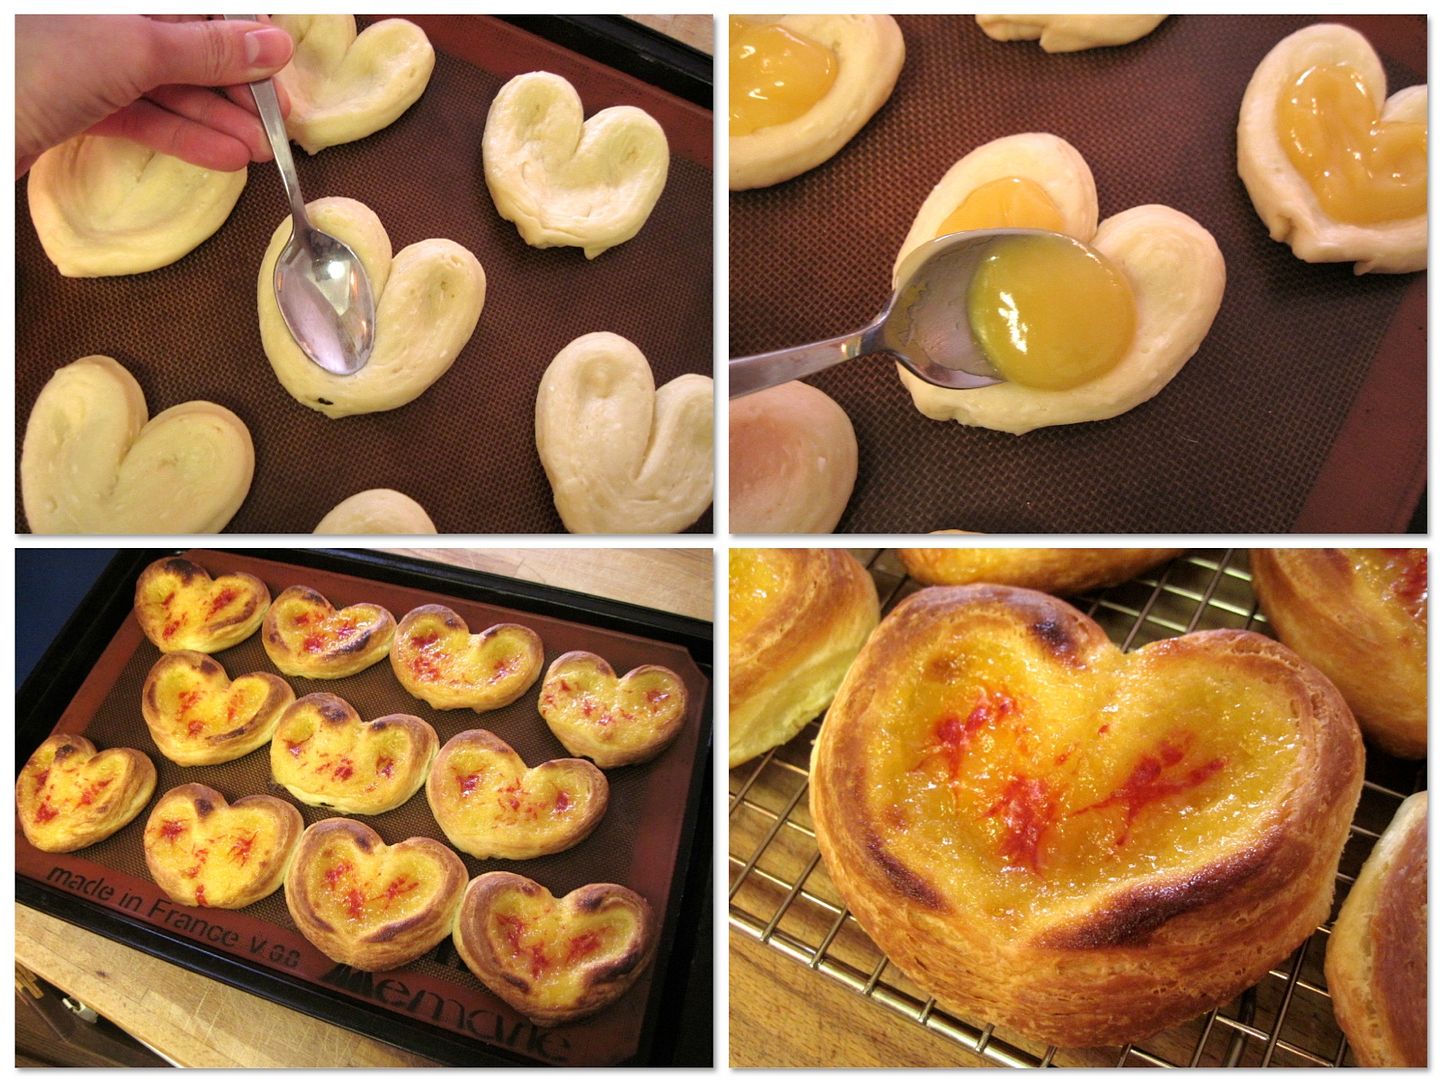
I filled the Danishes with a lemon curd made with a rather unique method, which I will share in the next few days. In an attempt to make these pastries even more Valentine’s appropriate, I tried to make little hearts of raspberry purée in the lemon curd, but it didn’t work out so well (they looked like blobs) and I ended up just swirling the raspberry into the curd – which bubbled up in the oven, so even if the hearts had looked like hearts, they wouldn’t have survived. So I would either skip the raspberry purée altogether (it didn’t make a difference to the taste) or for a proper lemon-raspberry Danish, top each with a few whole raspberries before baking.
Happy Valentine’s Day, friends. I hope you are feeling the love, today and always!

Lemon Heart Danishes
Makes 20 medium Danishes
Quick Danish Pastry
Adapted from Beatrice Ojakangas
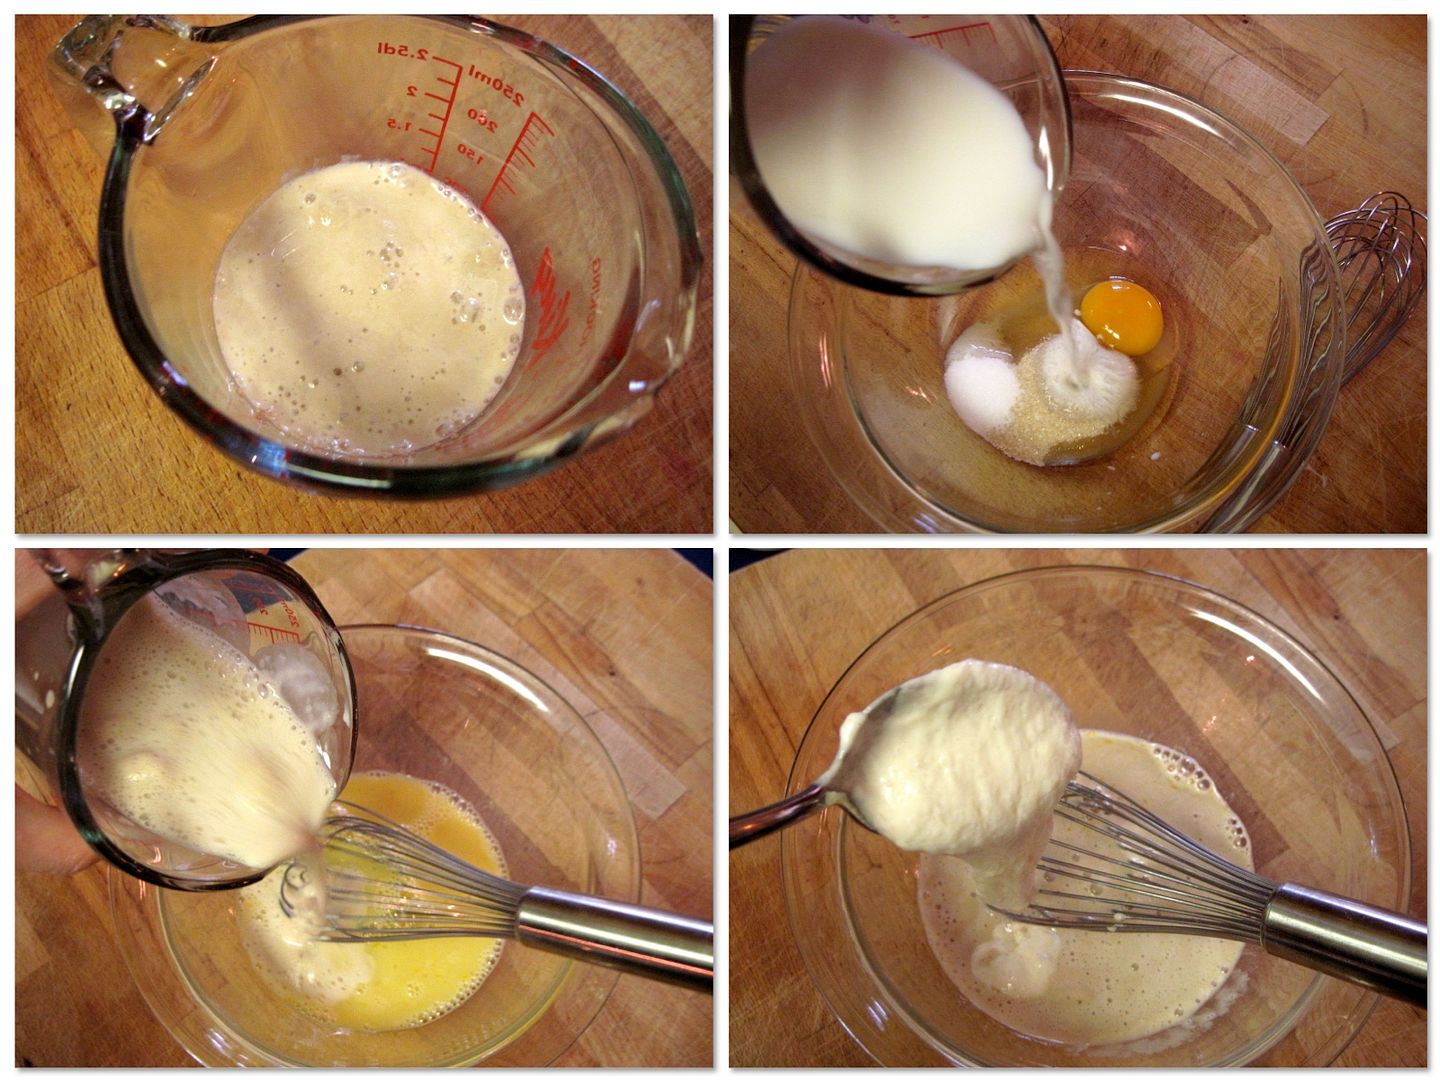
In a measuring cup, combine:
1/4 cup very warm water
1 package / 2 1/4 tsp active dry yeast
Stir and set aside until the yeast starts to foam and look creamy.
In a small bowl, whisk together:
1/2 cup milk, at room temperature
1 egg, at room temperature
1/4 cup sugar
1 tsp salt
Stir the now-foamy yeast into the milk-egg mixture.
(Totally optional: stir in a few spoonfuls of discard sourdough starter.)
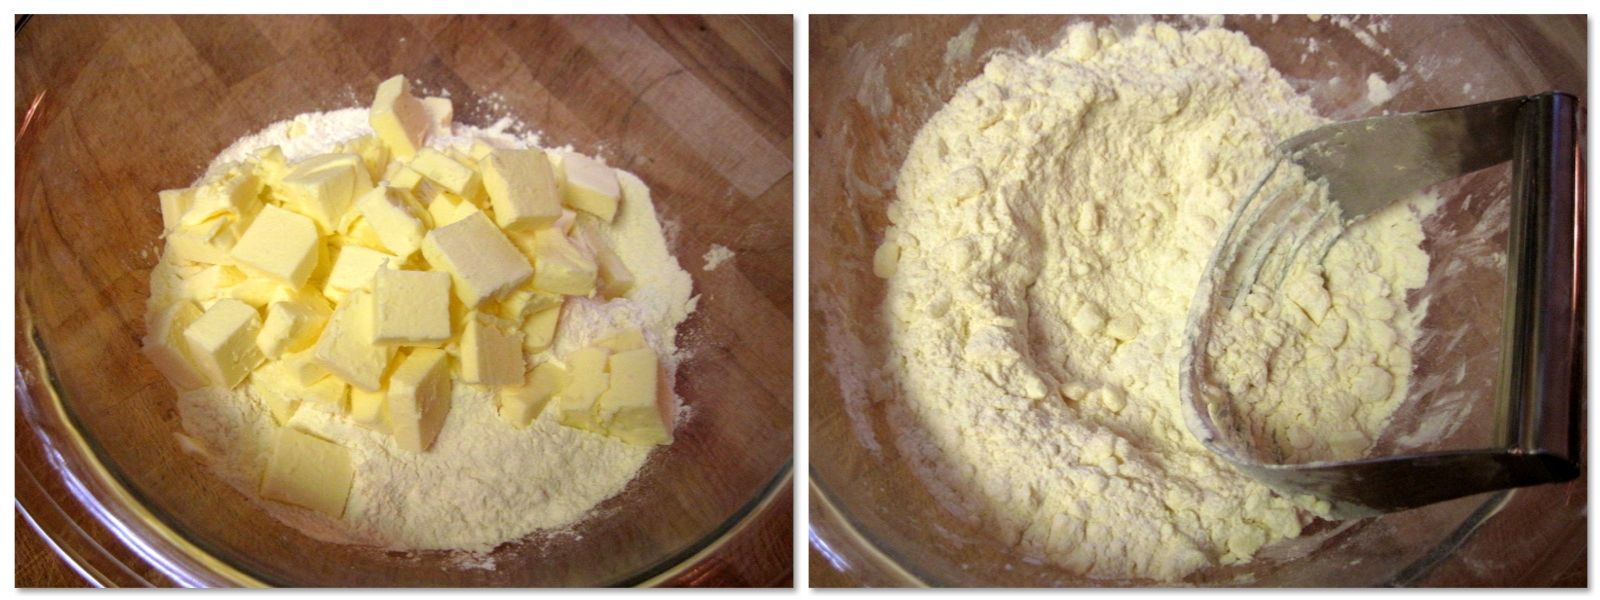
In a larger bowl, place:
2 1/2 cups all purpose flour
With a pastry cutter, cut in:
1 cup / 8 oz cold, unsalted butter, cubed
Cut the butter until it is in 1/4 inch pieces (this can also be done in a food processor).
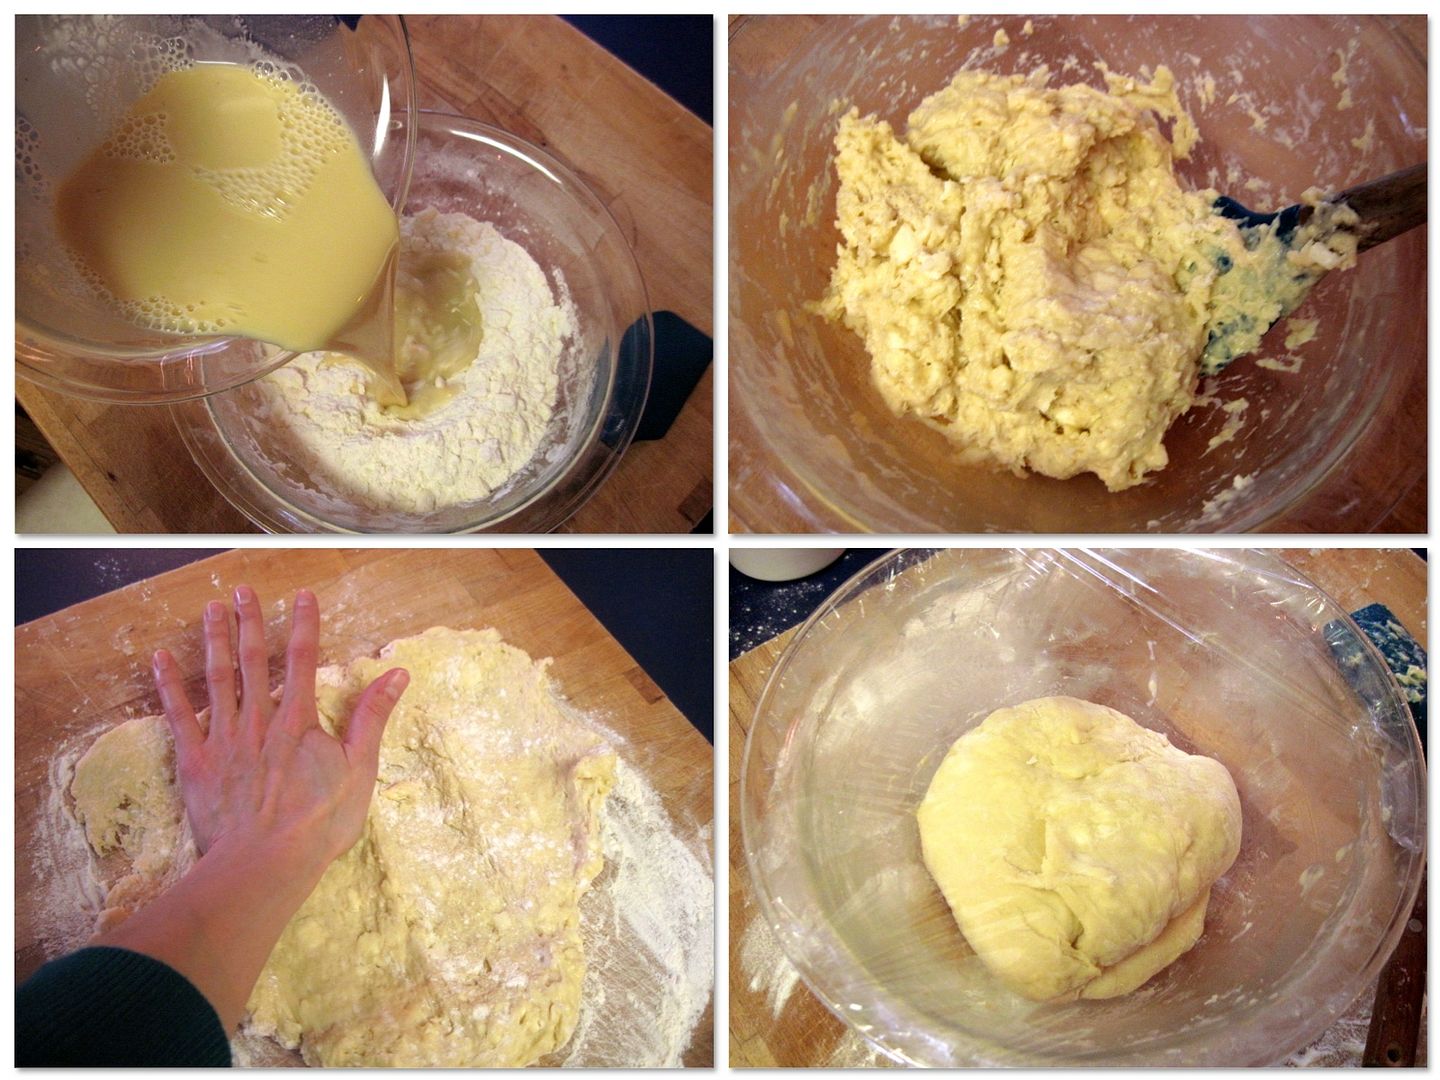
Pour the yeast mixture into the flour mixture and fold gently with a spatula to combine. Do this gently as you want the butter to stay in discrete pieces.
(Optional step: I turned the dough out onto a lightly floured surface and did a few frissage passes to try to make the butter pieces long and flat, which is supposed to mean flakier pastry. I don’t know if it made a difference or not.)
Cover the bowl containing the dough with plastic wrap and refrigerate overnight, or up to 4 days.
To finish the dough, turn it out onto a floured surface and pat it into a square shape. With a rolling pin, roll it out into a 16″ square. Fold it into thirds, like a letter, then turn it so the closed edge is on your left. Roll it out again, this time into a long rectangle measuring 10″ x 24″. Again, fold in thirds to make a square, and turn so the closed edge is on your left. Roll into a large 20″ square. Fold in thirds once more to make a rectangle, then again to make a square.
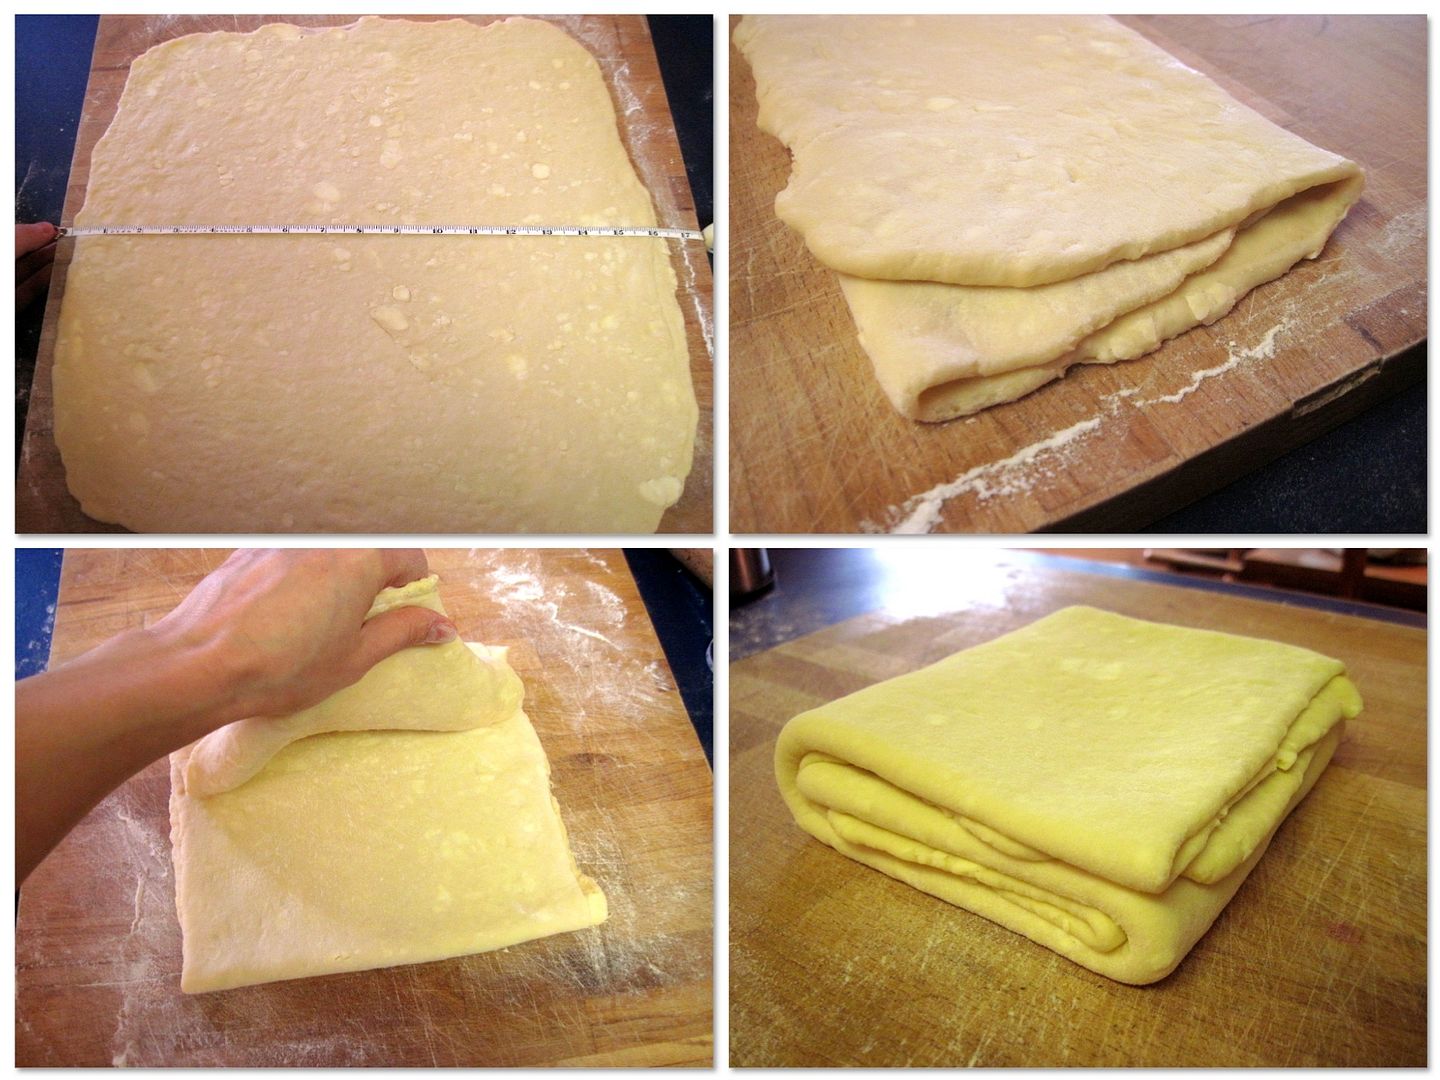
If the dough/butter gets too soft during this process, chill it for about 30 minutes to firm it up. It’s important that the butter doesn’t melt into the dough, otherwise all your rolling and folding will be for nought. Also, try your best to roll the dough out to the specified dimensions, which will make the final roll out when you shape the dough much easier. Be patient and give it a minute to relax if it resists rolling.
Wrap the square of dough in plastic and chill for at least 30 minutes or until firm. It can be refrigerated for up to 4 days, or frozen for 1 month, tightly wrapped (thaw overnight in the fridge).
Danish Assembly
Heart shaping method adapted from Blissfully Content
Roll the chilled dough out on a floured surface into a 20″ square. Try to keep the edges as neat and square as possible, but no big deal if it’s not perfect. Cut the large square into 20 small squares: cut into 4 x 5″ strips in one direction, then cut perpendicular into 5 x 4″ strips. This will give you 20 squares measuring 4″ x 5″. Roll up each little square from one longer side.
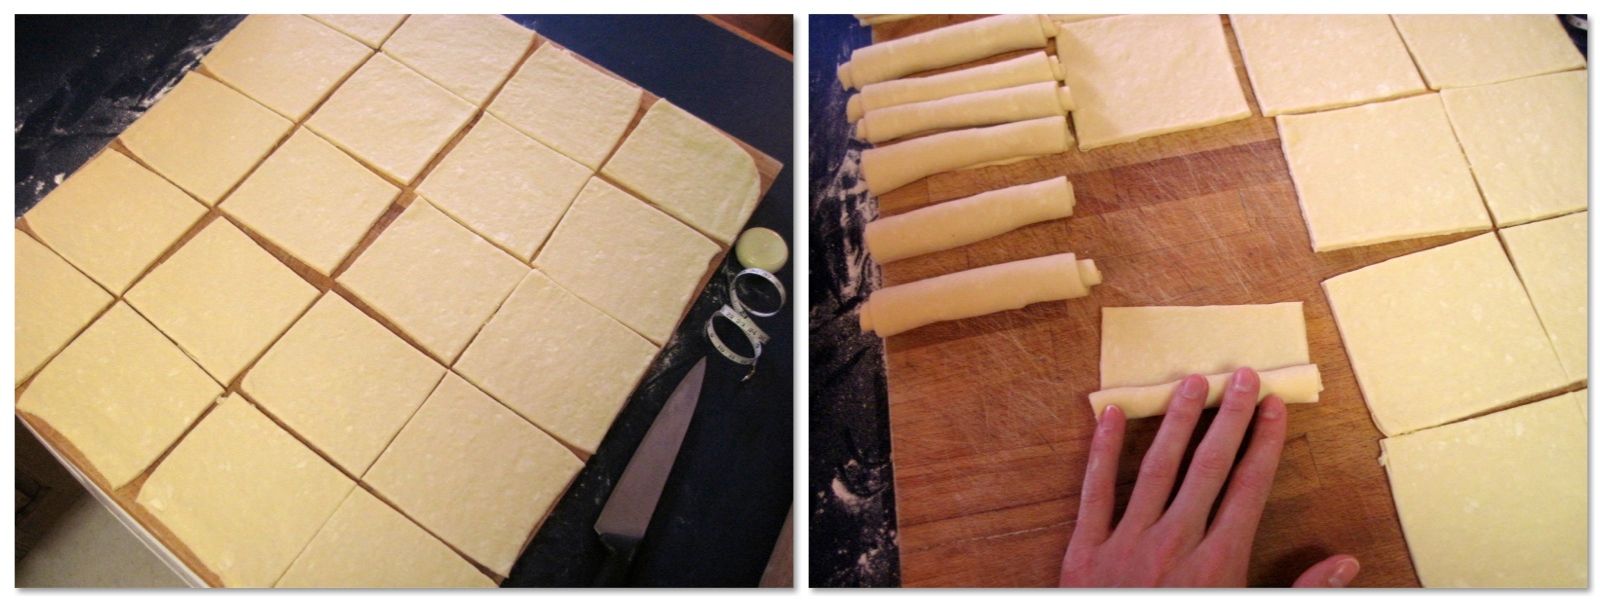
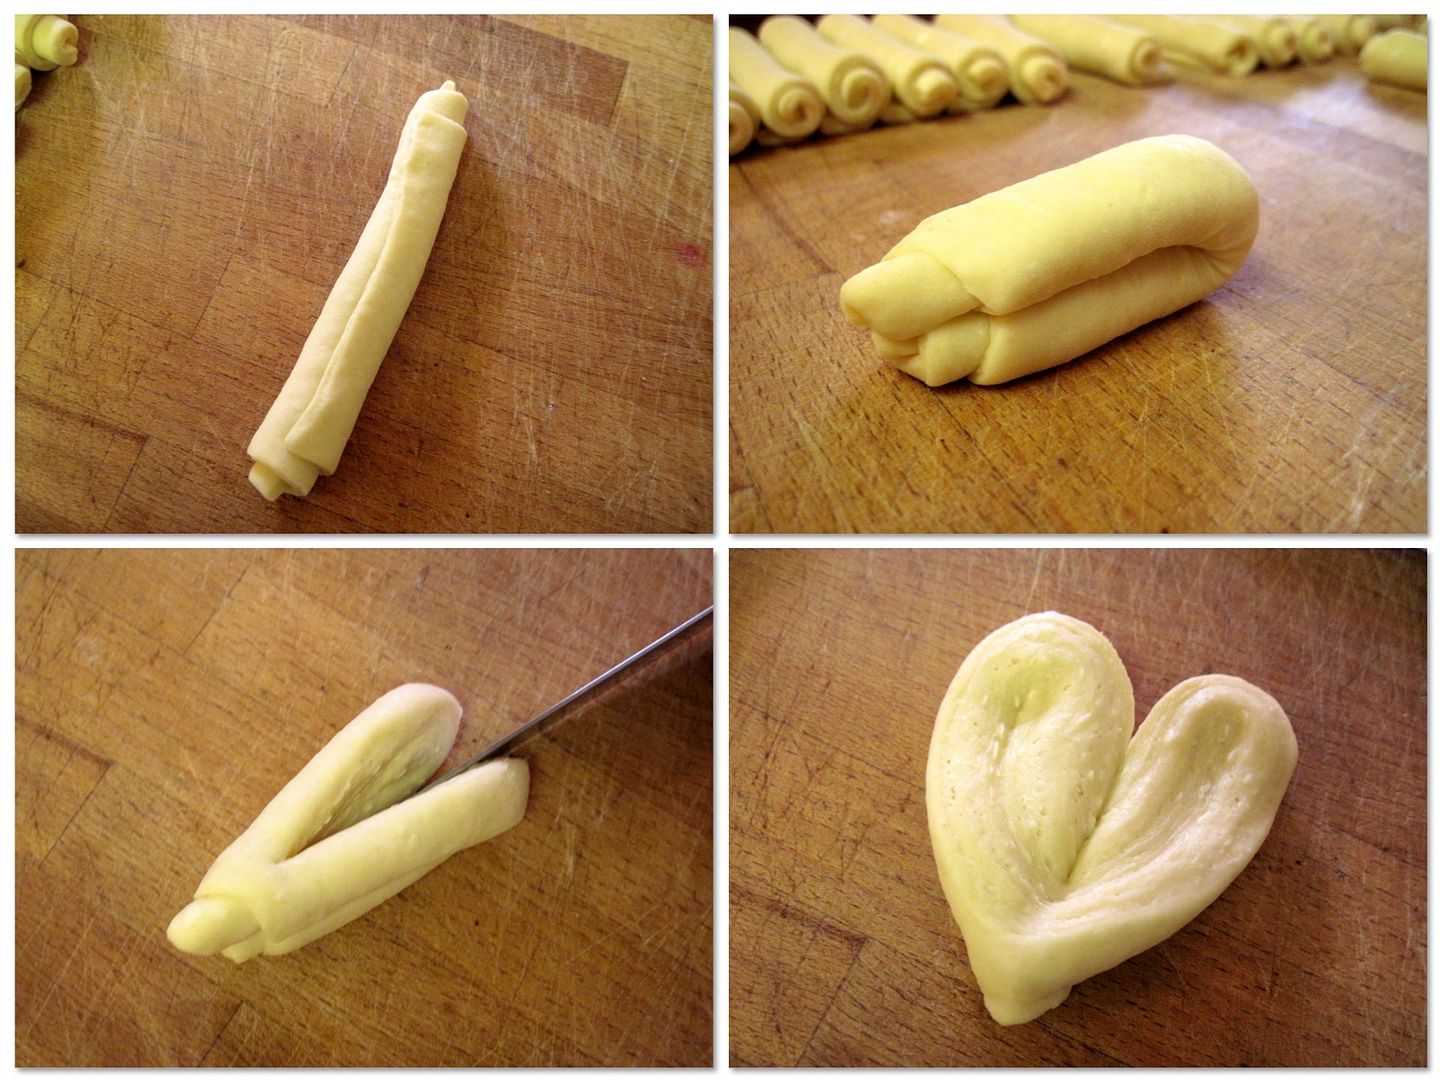
With the seam facing up, fold the roll in half so that the top end slightly overlaps the bottom end. Pinch the ends together and press the whole thing slightly. With a sharp knife, cut the folded roll down the middle to make two “ears”, stopping about 1 cm from the loose ends. Unfold the “ears” to form a heart.
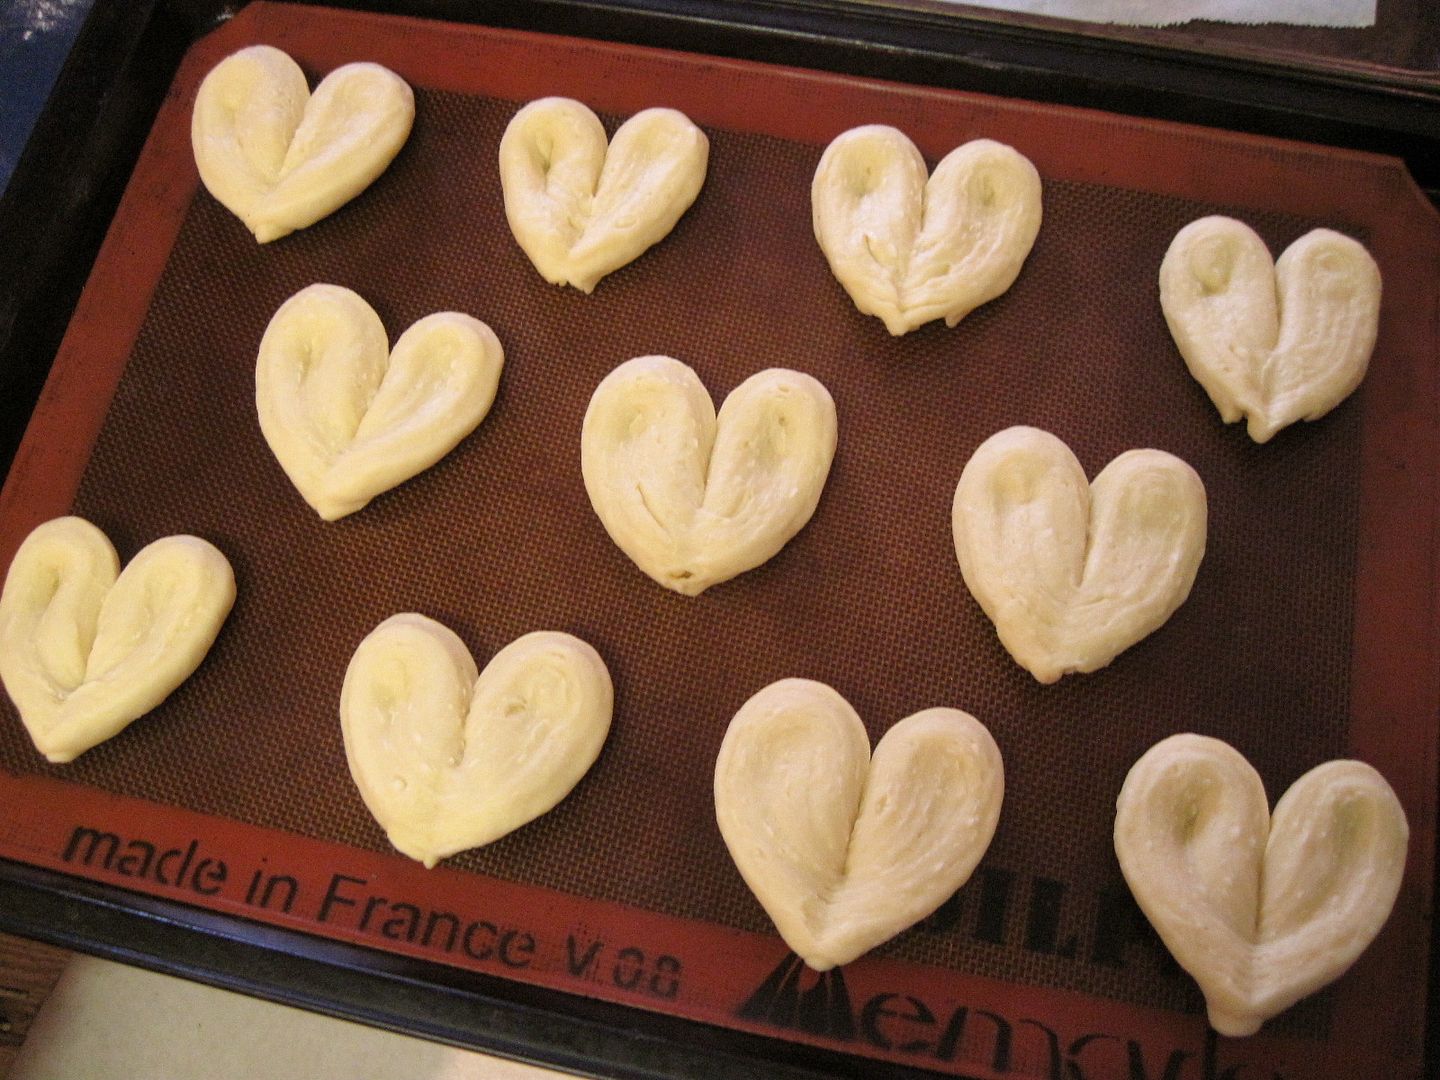
Place the hearts on a baking tray lined with a silicon mat or parchment paper. Cover loosely with plastic and let proof at room temperature for 30 – 45 minutes, until puffy. While the Danishes proof, preheat the oven to 375˚F.
With the back of a lightly floured spoon, press a slight indent in the the middle f each heart. Fill the indent with about 1 tbsp of lemon curd (you will need about 1 1/3 cups of lemon curd total). For lemon-raspberry Danishes, top the lemon curd with a few whole raspberries (skip the raspberry purée!). Bake the proofed, filled Danishes in the preheated 375˚F oven for about 20 – 25 minutes, until puffed and darkly golden brown. Cool on a rack.
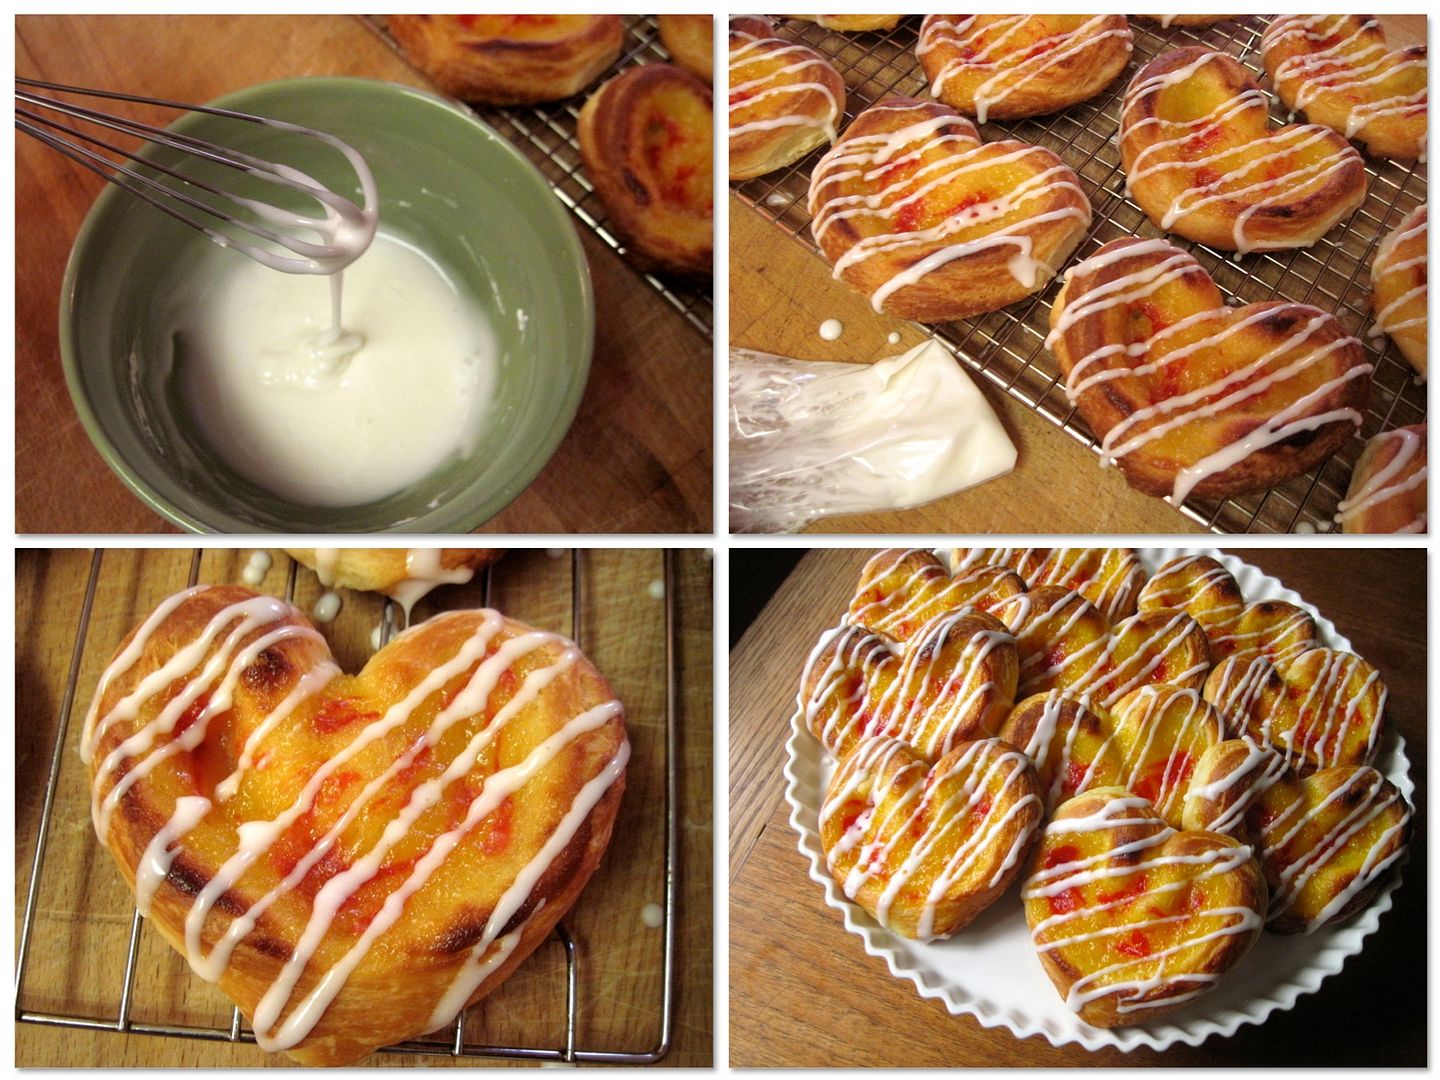
Stir together an icing of 3/4 cups icing sugar and a few tsp milk to make a thick yet drizzly icing. Place the icing in a Ziplock bag, snip a tiny bit off one corner of the bag, and drizzle the icing over the cooled Danishes. Let the icing set before serving.
These are best eaten the day they are baked, but I’m certainly not complaining three days later! (Store in an airtight container.)
This post has been YeastSpotted!
